SageMaker: SSH to notebook instances
If you’re using SageMaker as a development machine, you’ll need SSH access to notebook instances sooner or later.
You’ll want to copy your notebook over with scp.
Or you’ll get stuck and want to connect a remote debugger with PyCharm or VsCode.
Or just access your GitHub repositories without leaving your private key lying around, accessible to anybody who has access to AWS console in your company.
You will Google with no luck. Then you’ll ask AWS and figure out it’s not supported.
Luckily, it’s possible to make it work. I use it every day and it’s super useful.
Like other SageMaker guides here, this one will show you how to set up SSH access to SageMaker notebook instances in just a few minutes.
Why isn’t Sagemaker SSH natively supported by AWS?
SageMaker notebook instances are managed by AWS. They are EC2 instances and part of your account, but if you list all EC2 machines, you won’t see them.
That gives you less control over SageMaker instances. You can control basic network settings like VPC, security groups, and whether it will have direct internet access or not, but you can’t assign a public IP address to it.
Because SSH needs some way to talk to the notebook instance and you can’t assign a public IP address, your machine has no way to talk to the notebook instance directly.
Can I access Jupyter from my browser?!
Yes. The way your browser talks to the notebook instance is through proxy run by AWS. It does not talk directly to the notebook instance.
We’ll do something similar to enable SSH access.
How does the setup work?
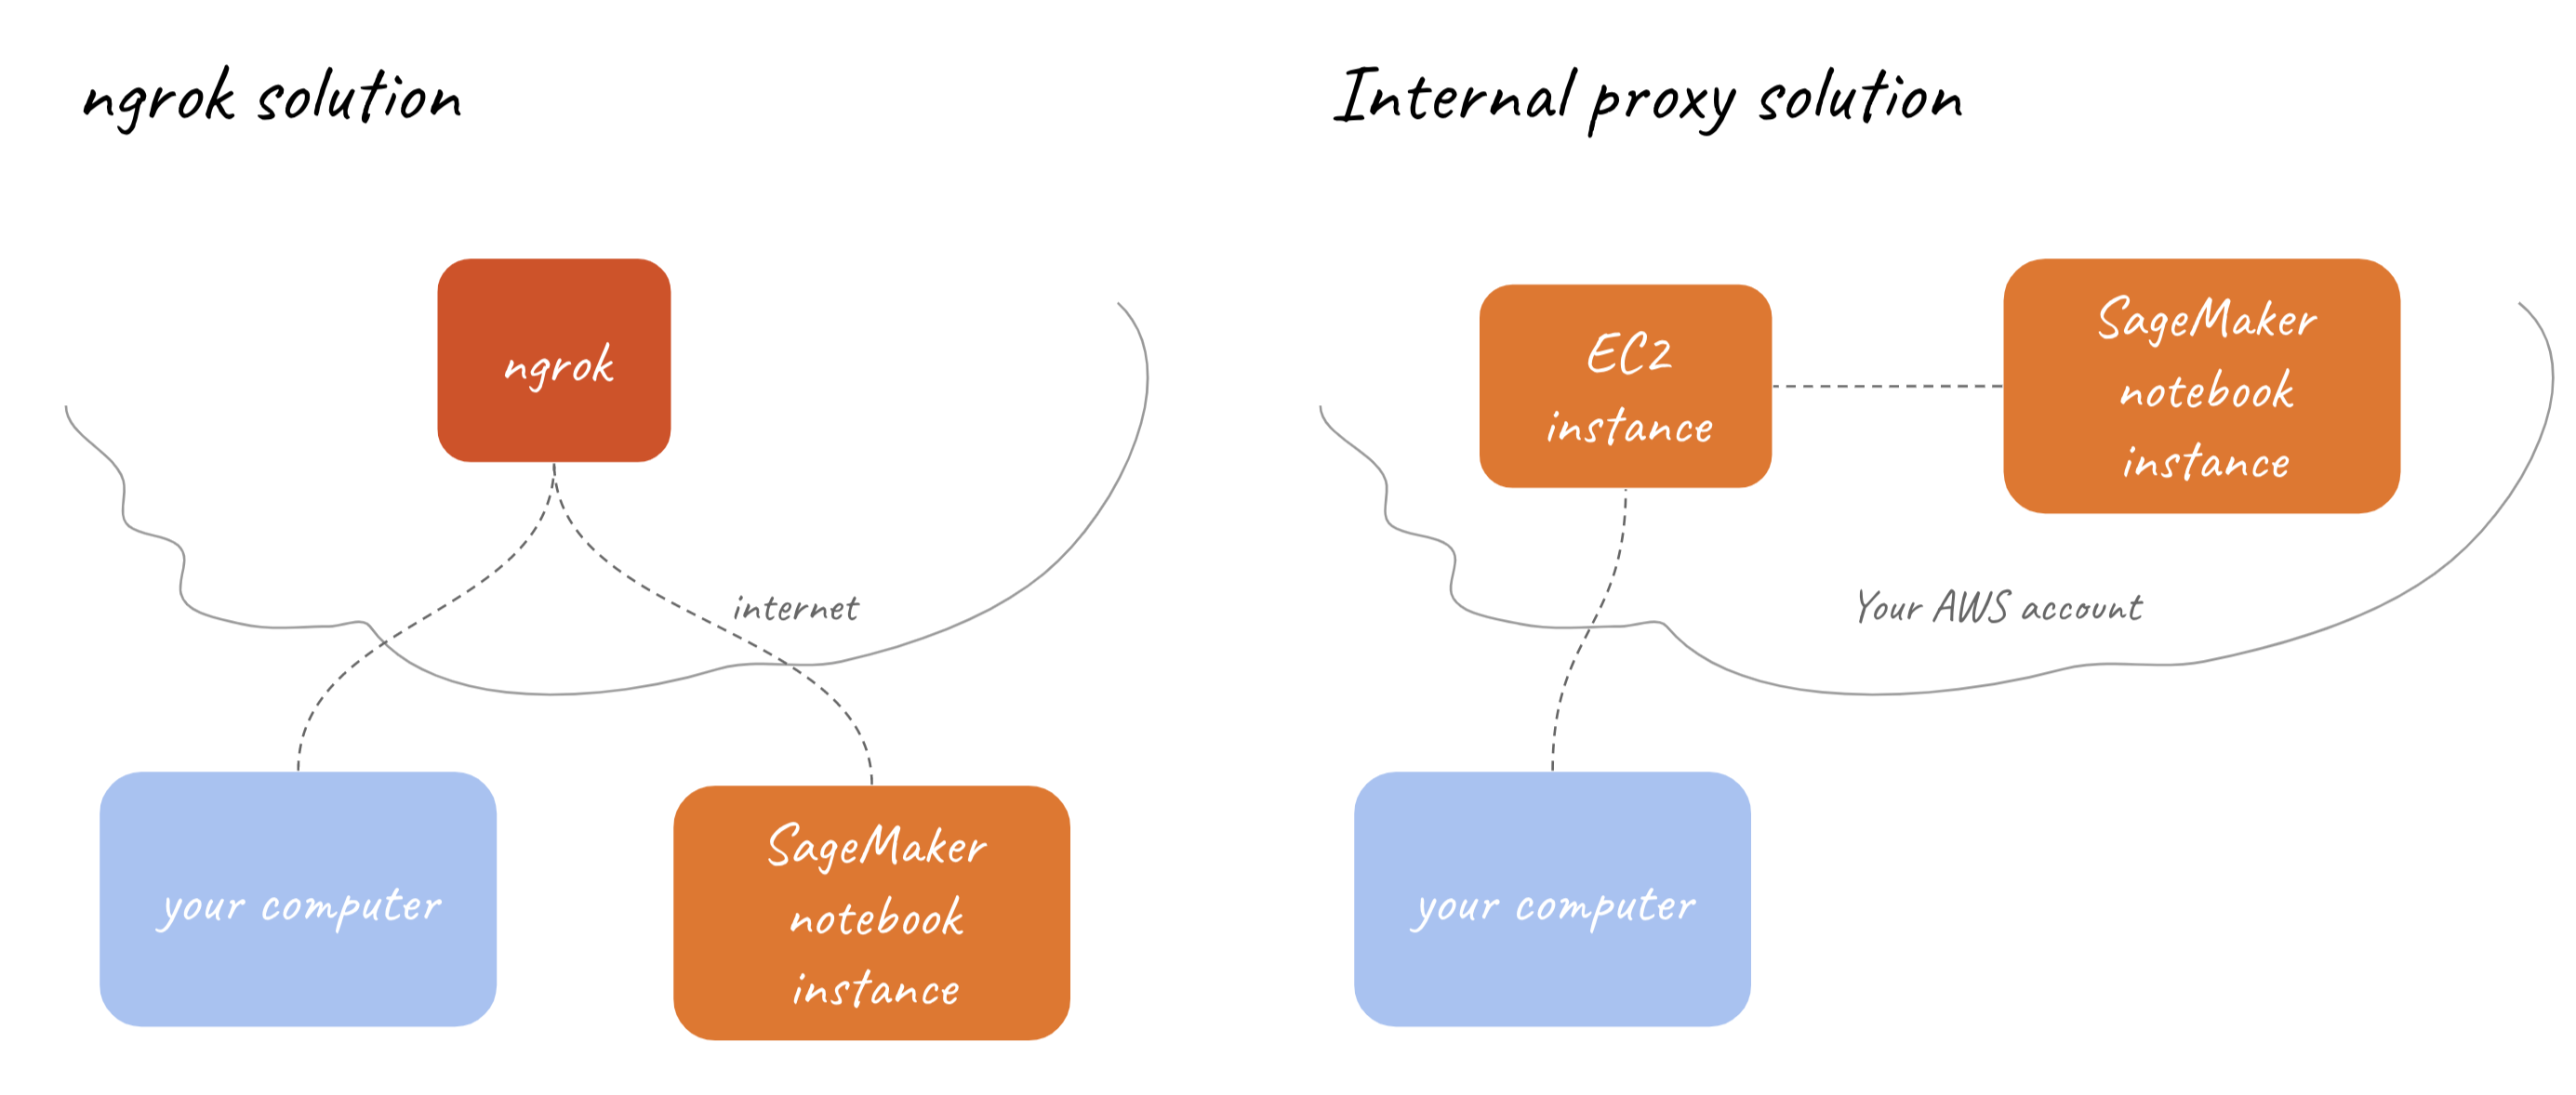
As you’ve probably figured it out already, we just have to drill some way for your machine and notebook instance to talk to each other.
When two machines can’t talk to each other, but they both know a third machine, they can ask that third machine to exchange their messages. That’s exactly what we’ll do.
I’ll show you two solutions. One using ngrok reverse proxy (3rd party proxy) and the other one proxying through other EC2 instance (usually called bastion) in your account. If you’re not sure which one you should use, one with ngrok is probably the right one for you.
Also, you can check the table below to see which solution is the right one for you.

| ngrok | internal proxy (bastion) |
|---|---|
|
Suitable for single developers and small teams
|
Suitable for organizations with multiple teams
|
SageMaker SSH
Prepare lifecycle configuration
Before we start with any specific setup, we have to make sure there is a lifecycle configuration attached to your notebook instance.
If there is no configuration, we will create a new one with the name “better-sagemaker” and configure the ssh in it.
Steps:
- Login to AWS console
- Stop your notebook instance (and wait for the instance to stop)
- Make sure you have jq tool installed
-
Copy the following script into your terminal (on your computer, not SageMaker).
Do it step by step.
If you know there is one and you know the name, you can just fill
INSTANCE_NAMEandCONFIGURATION_NAMEvariables and skip the rest.
Set up SSH with Ngrok
Ngrok is a third party reverse proxy that will tunnel our your traffic. Don’t worry, SSH is encrypted end to end so ngrok can’t read any of it.
To get permissions for creating TCP tunnels, you’ll need a free ngrok account and find an authentication token in their dashboard.
Once you grab it, fill in the token below and run it step by step.
That just made sure that ngrok starts every time the notebook instance starts, with your authentication token.
The ngrok config is located in /home/ec2-user/SageMaker/.ngrok/config.yml. If you want to add a fixed remote_addr to have the stable address to connect to (you’ll need a pro account for this), you can change it in the config file.
Also, if the tunnel ever closes (connections can drop), you can start the tunnel again by running start-ssh-ngrok in your SageMaker terminal. It will run in the background.
And that’s almost all the setup we need. You can start your instance now.
We just need to set up your ssh keys.
Set up SSH with bastion instance
Setting this up with bastion requires a little bit more work and knowledge about AWS. It’s not too scary, though. If you need help with setting up a bastion instance, this guide can help you.
Once your bastion is set up:
- Make sure you can ssh into bastion box
- Change the security group of your SageMaker machine to allow inbound TCP traffic on port 22 from the bastion security group
-
Add this to your
~/.ssh/config. It will make sure all connections to hostnames ending with.ec2.internalgo through your bastion box -
Now we just have to make sure we always know the internal address of your SageMaker machine.
Let’s edit lifecycle configuration to write that address into a file so we can see it from the browser.
That’s it. Let’s just set up your ssh keys so SageMaker machine knows who should have access and who should not.
Set up SSH keys
So far we’ve set up the way to talk to your SageMaker instance, but we still haven’t defined who exactly can access these machines.
To do so, we’ll have to add public keys for all users that need access to ~/SageMaker/ssh/authorized_keys.
That likely means that you will have to copy whatever is in your local ~/.ssh/id_rsa.pub into ~/SageMaker/ssh/authorized_keys on SageMaker instance.
Once you’ve done that, make sure you run copy-ssh-keys on SageMaker terminal so these keys are copied to the correct location.
SSHing into your notebook instance
Every time your machine starts, the address you have to connect to will change. It’s unfortunate and can be fixed by more scripting, but I won’t go into details in this post (feel free to contact me if you really want it).
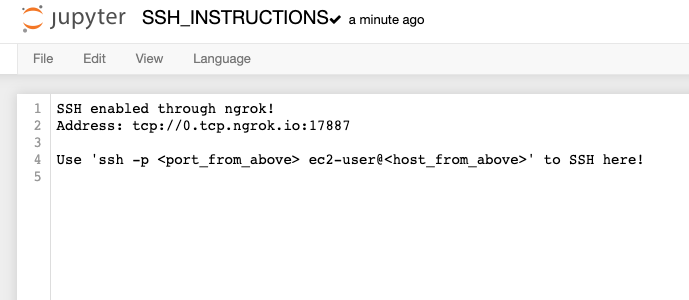
Every time it changes, it will be written to ~/SageMaker/SSH_INSTRUCTIONS file. If you click on Open Jupyter in AWS Console, it should be in the directory shown by default.

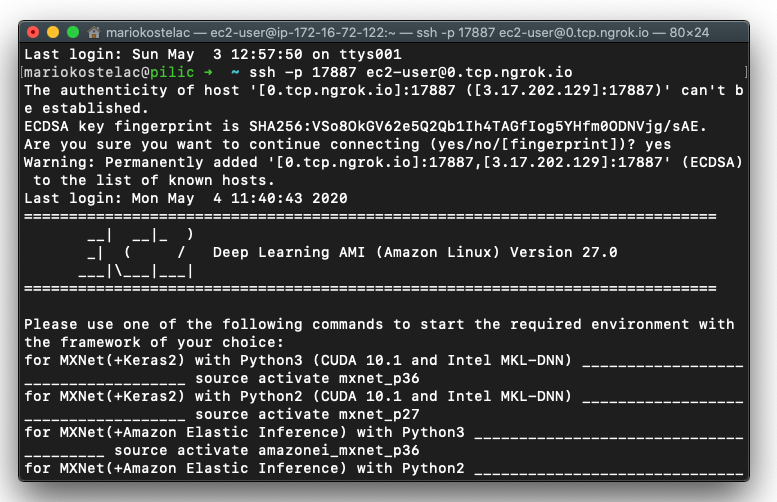
That’s it, just follow these instructions. For me, it was ssh -p 17887 ec2-user@0.tcp.ngrok.io and I was in!

More about the same topic
-
How to make startup scripts for Jupyter kernels reliable?
-
SageMaker: install Jupyter extensions in restart-proof way
-
SageMaker: save your conda environments after the machine restarts
-
SageMaker: automatically stop your instances when idle
